Every WordPress site needs an SEO plugin and when it comes to SEO plugins, YOAST SEO is by far one of the most popular options.
Yoast SEO is the original WordPress SEO plugin since 2008. It is a favorite tool of the millions of users, ranging from the bakery around the corner to some of the most popular sites on the planet . With Yoast Seo , you get a solid toolset that helps you aim for that number one spot in the search results. Yoast SEO for everyone.
Here is the beginner’s guide to Yoast SEO:
Using the Yoast SEO configuration wizard:
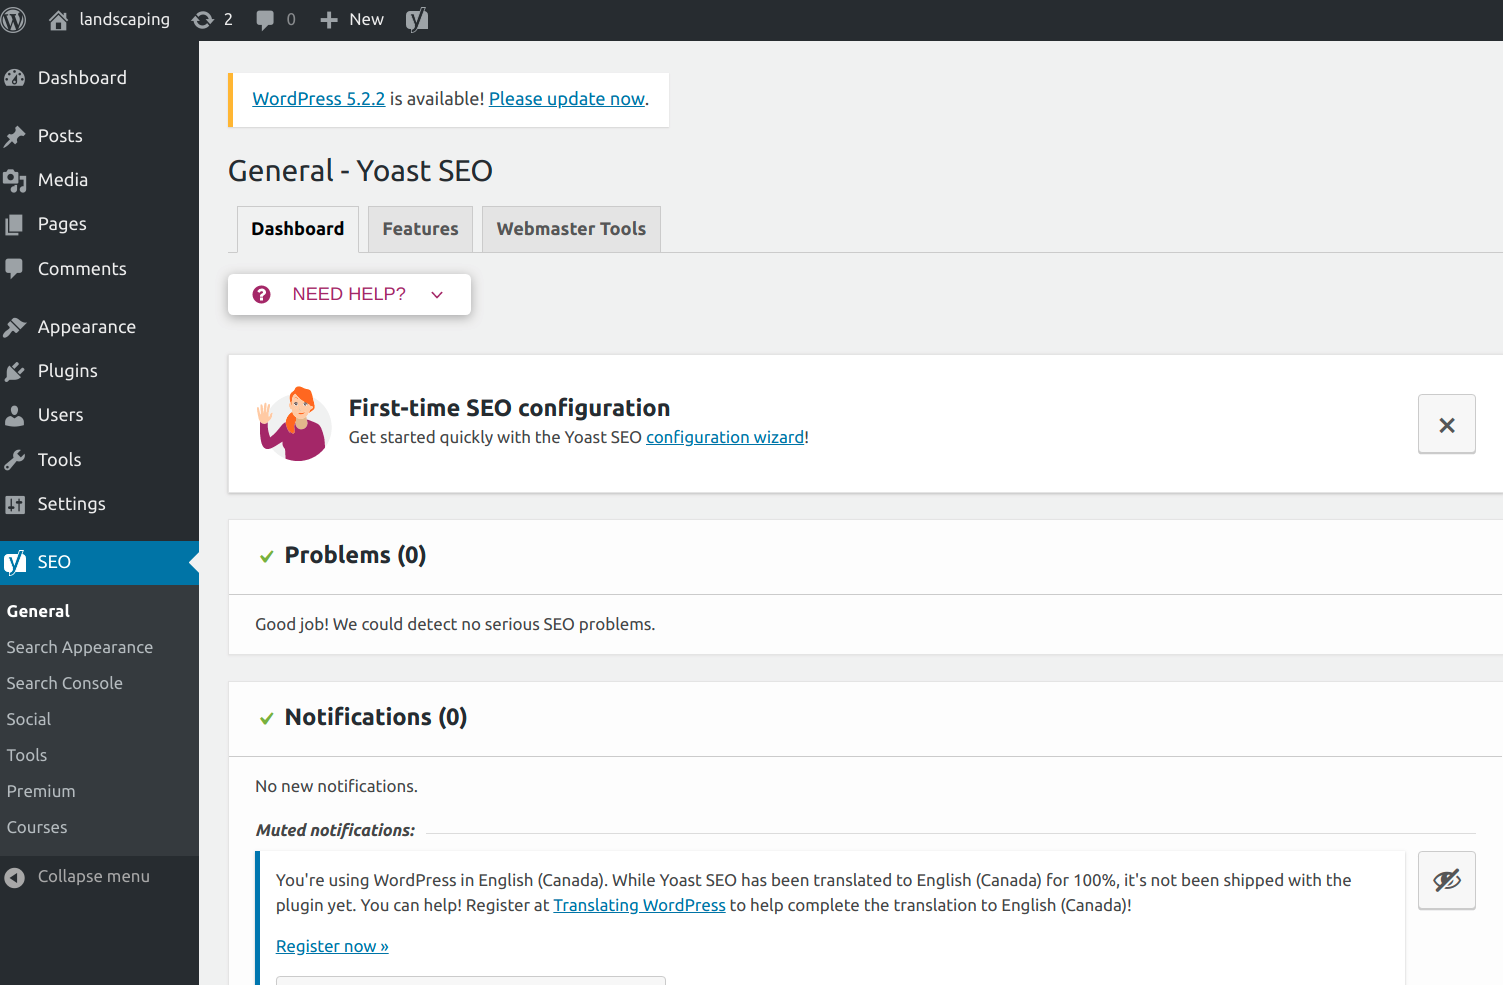
After installing Yoast SEO, you can access the yoast SEO dashboard by clicking on the new SEO tab in your WordPress dashboard.
If this is your first time using the plugin, you should see a big notice for First-time SEO configuration.
By clicking the configuration wizard link, Yoast SEO will give you a guided tour to help you set up all of the basic SEO settings:
There are 9 step to configure Yoast SEO.
Step 1 : Environment
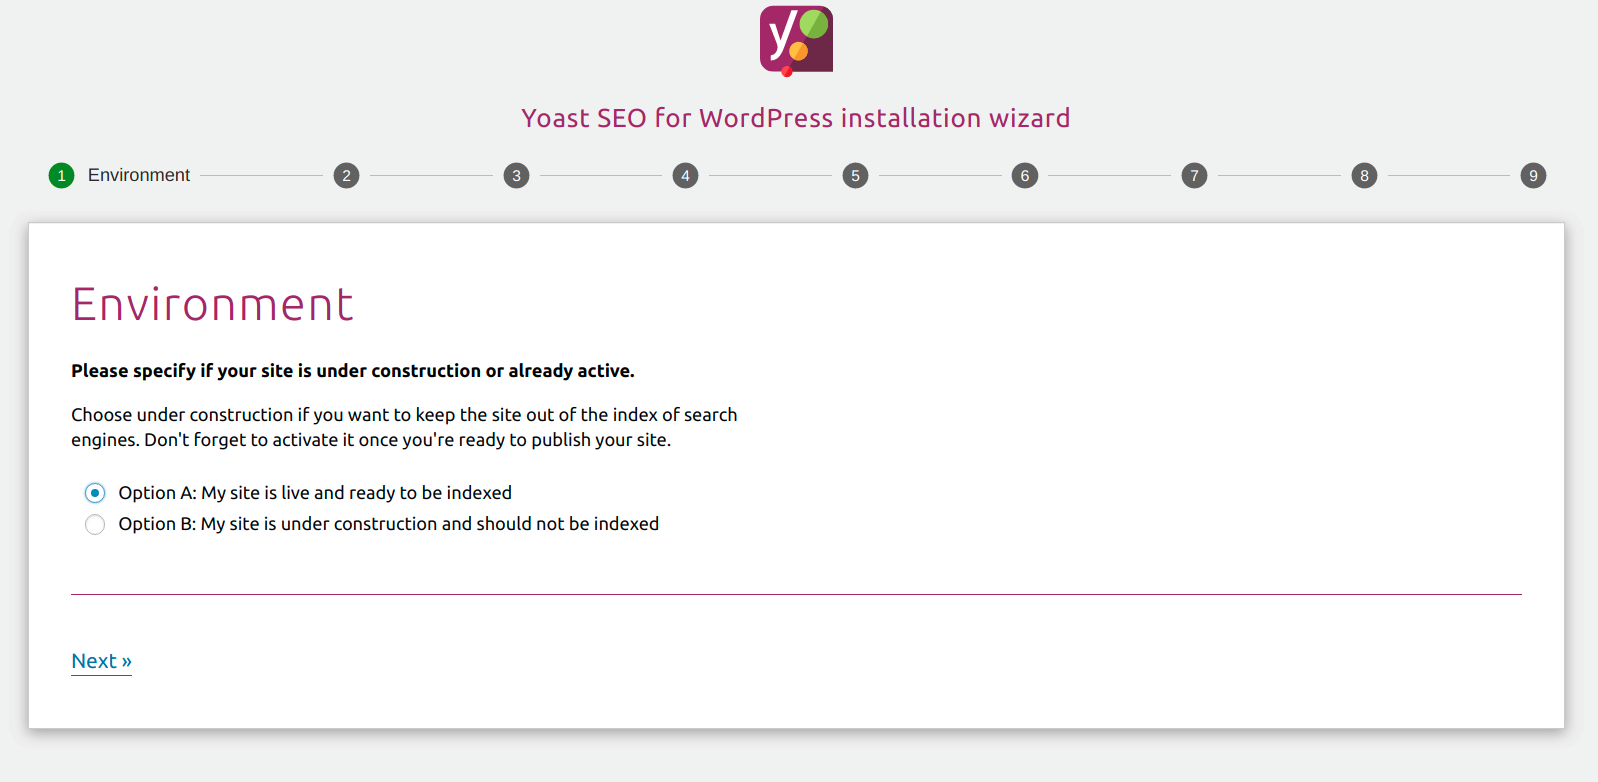
In the environment area, you should always choose Option A unless you are working on a development site.
Step 2 : Site Type
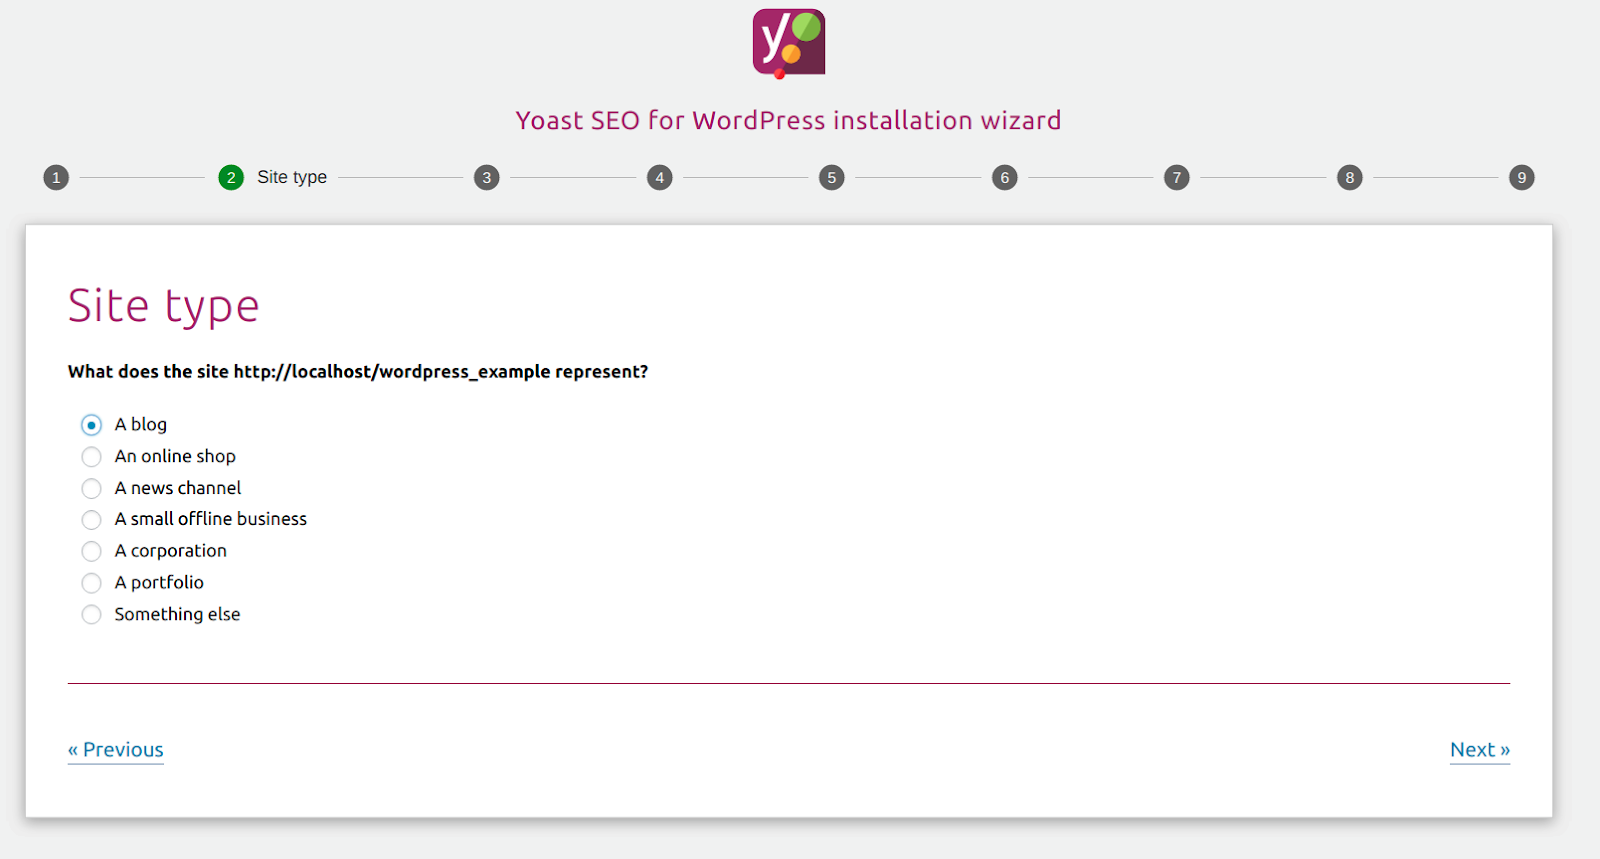
In the Site Type step, try to choose the type of site that best matches your site.
Step 3: Organization or Person
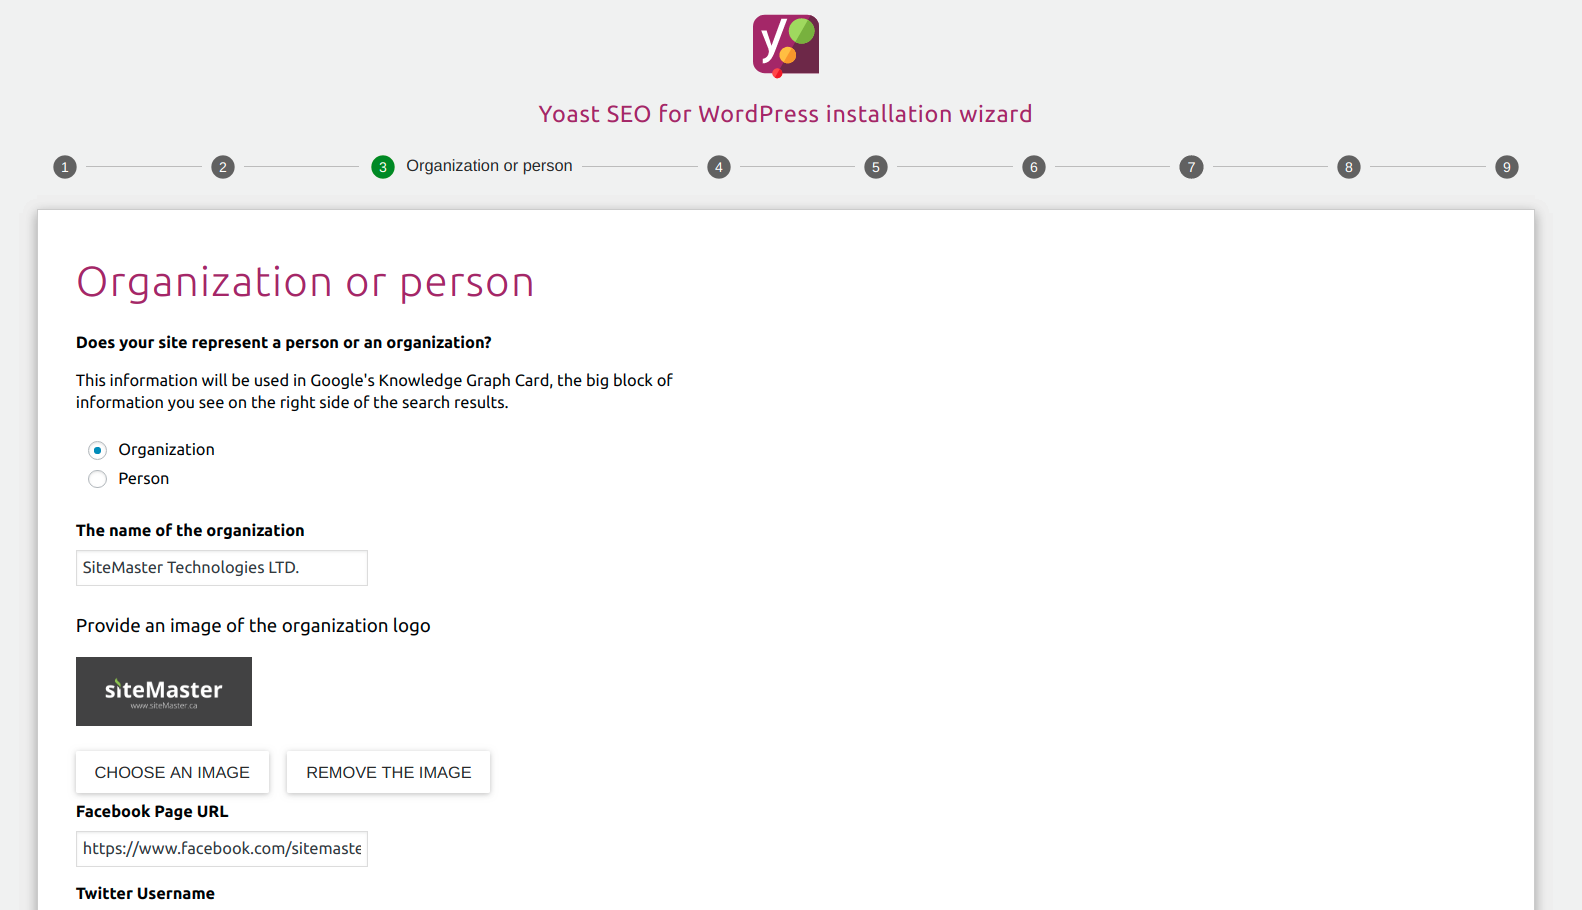
Next, choose whether your website represents an organization or a person.
If you choose Organization, you will be asked to also better:
- The name of the organization
- Your organization’s logo
And if you choose Person , you will just need to enter the name of the person.
Also you can your social media profiles too.
Step 4 : Search engine visibility
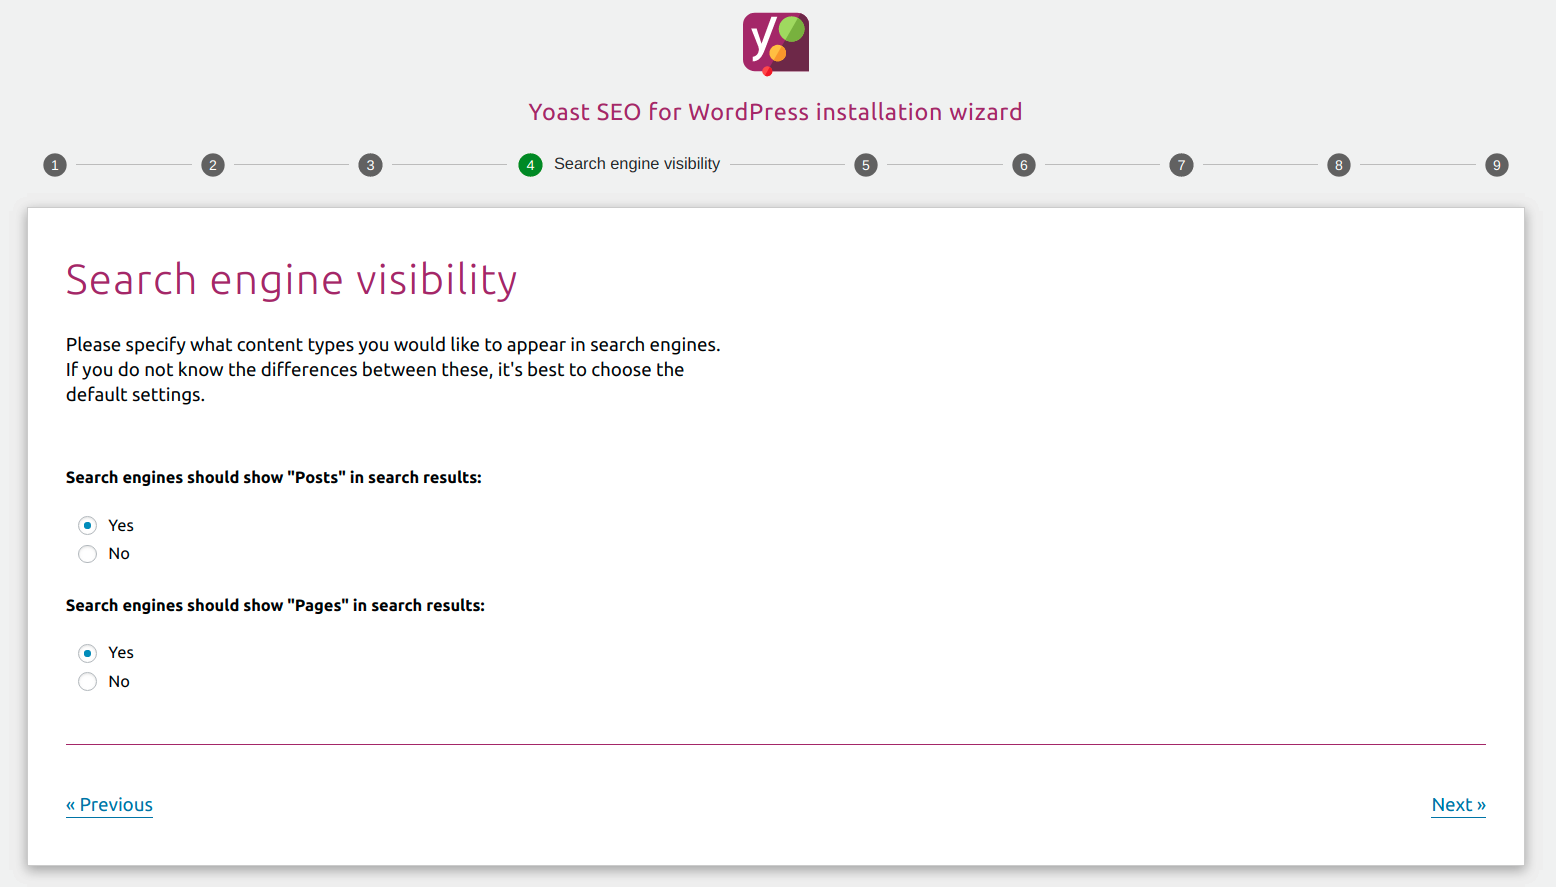
In the Search engine visibility step, you can choose whether or not allow certain types of content to be indexed in search engines.
Step 5 : Multiple authors

If you are the only person writing on your site, Yoast SEO will automatically mark your author archives as noindex to avoid duplicate content.
Yoast SEO does this because, on a single author blog, the author archives are 100% identical to your actual blog index page.
If you do plan to have multiple authors, choose yes so that people can still find a specific author’s post archives in the google search results.
Step 6: Title settings
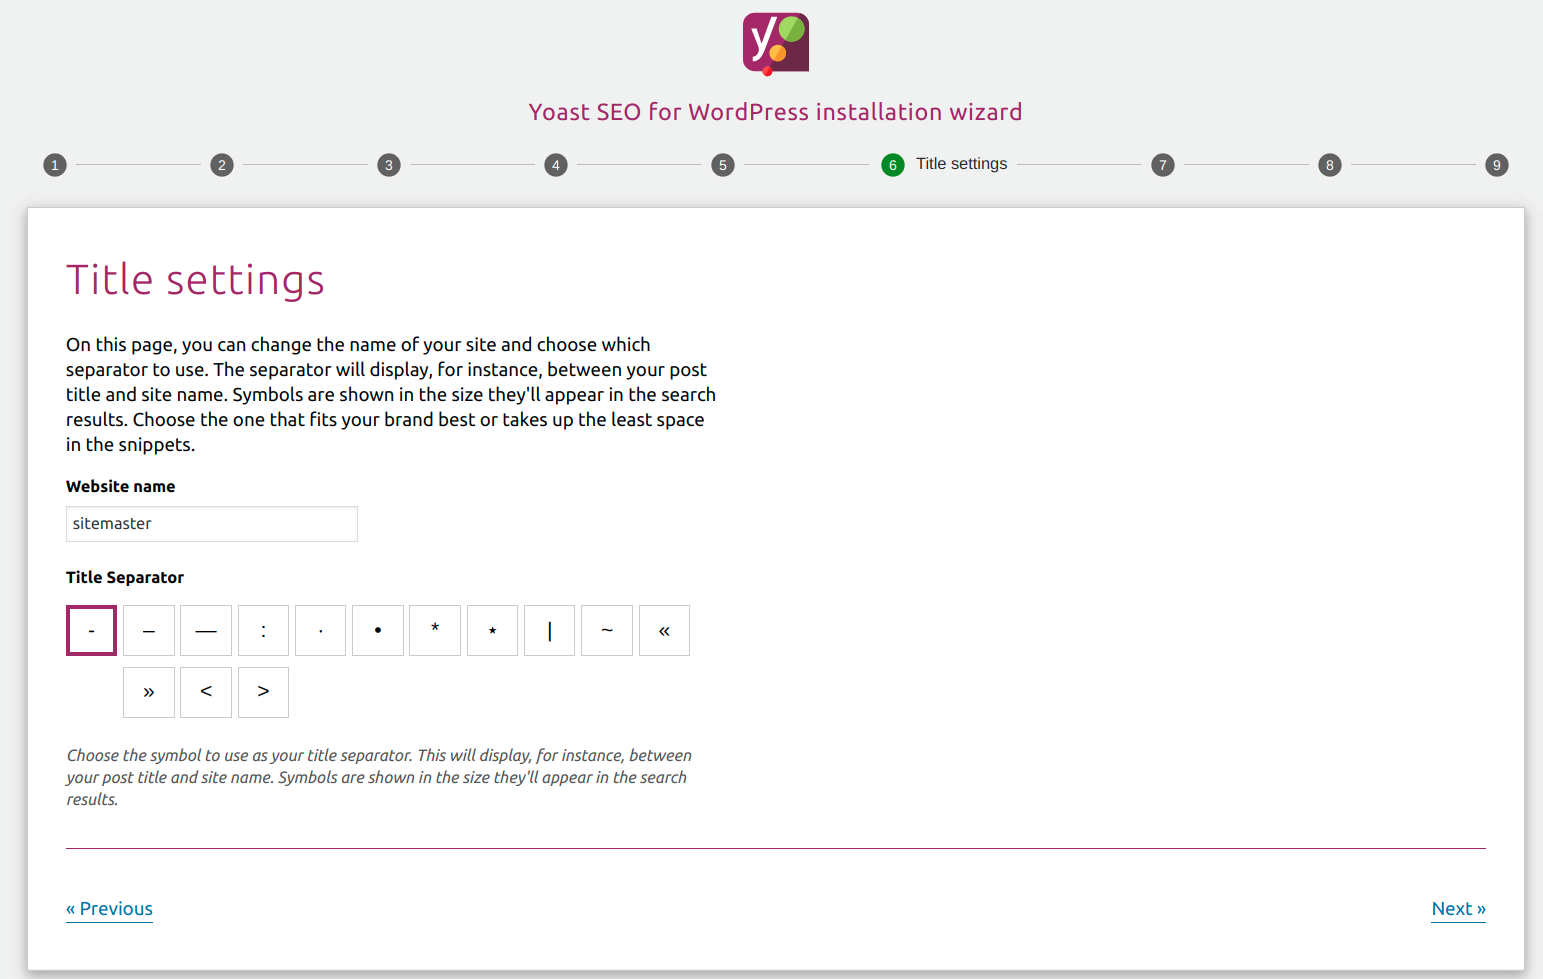
Your title is the main headline that appears in Google search results.
By default, Yoast SEO makes your title.
In this step, you can choose:
- Your website name
- The Separator
Step 7: Newsltter
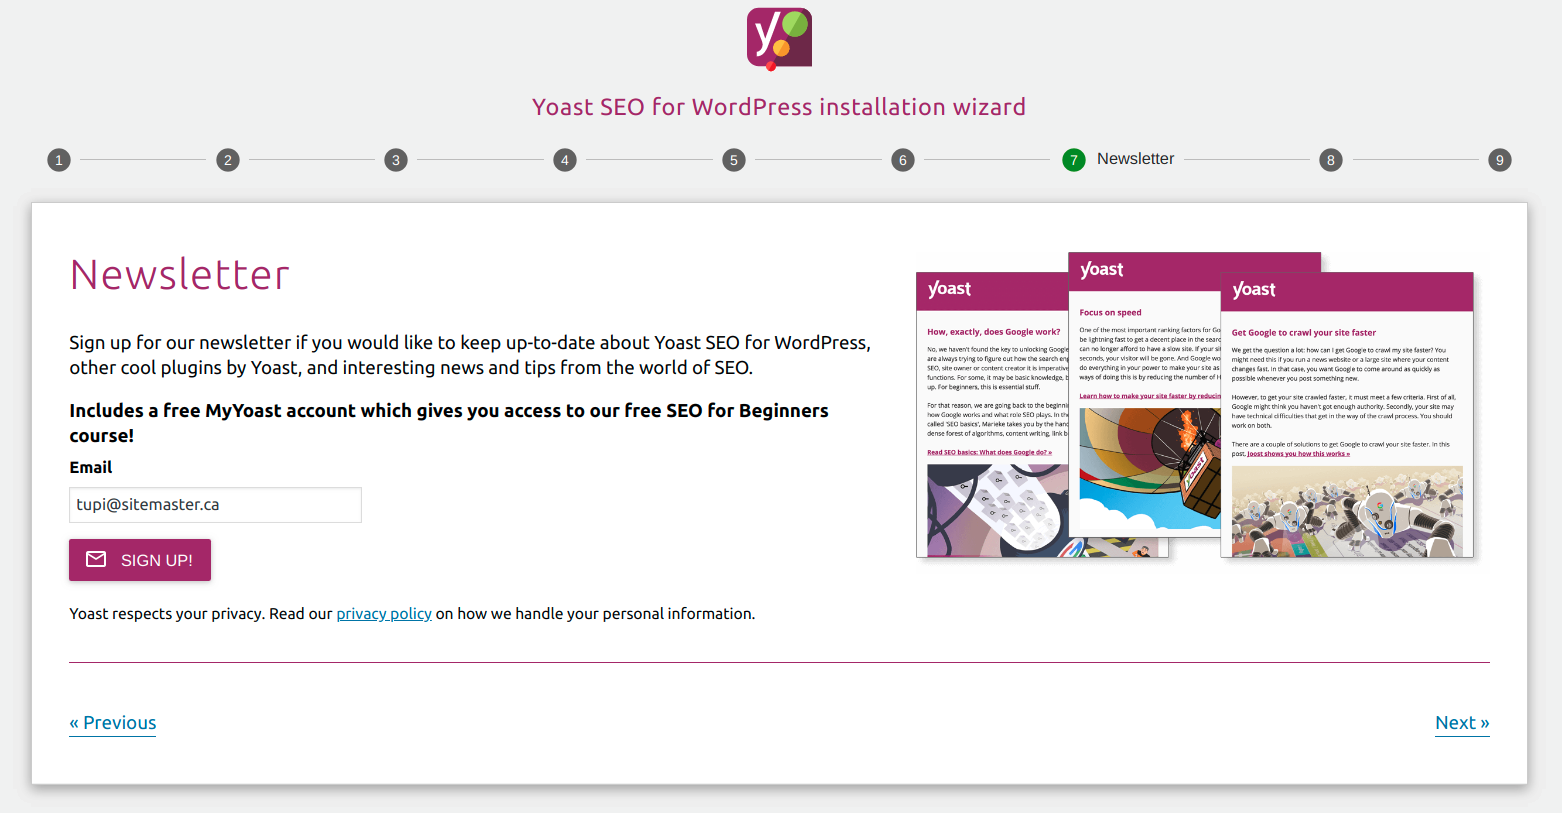
Newsletter contains practical SEO tips and insights that will help you to improve your own site:
- Insights in how to increase traffic to your site
- Loads of tips & tricks for wordpress: speed, layout, SEO: everything
- Automatic access to our free SEO for beginners training
Step 8: You might like
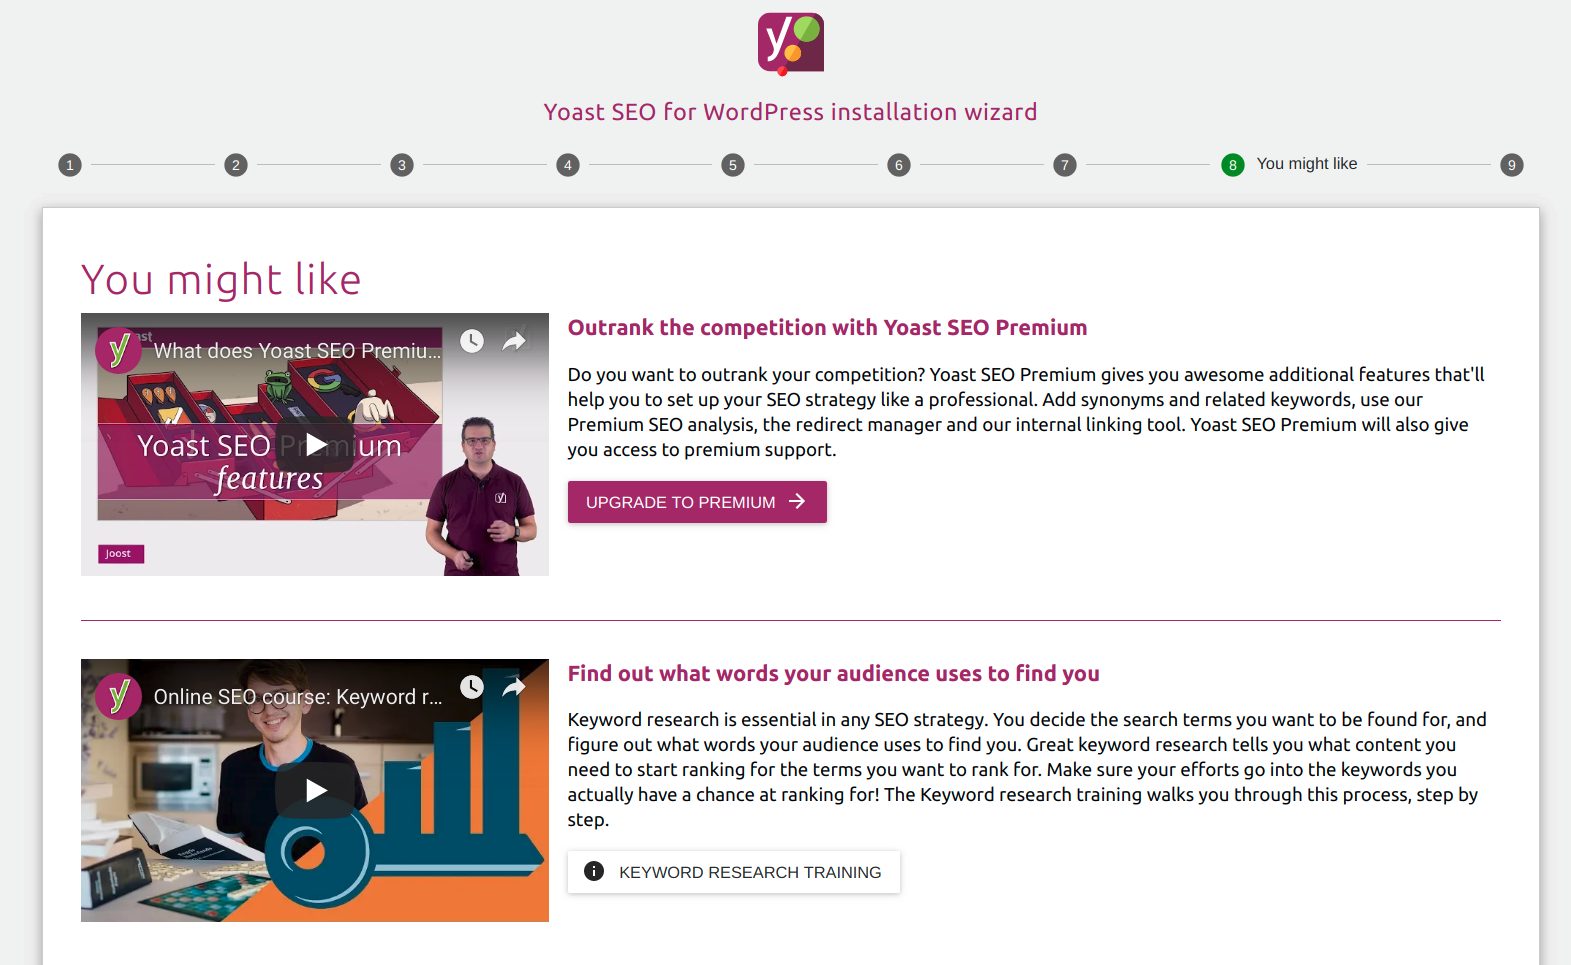
In this step you can see, Yoast SEO provides other features too like, Keyword Research Training, Yoast SEO Plugin Training.You need to purchase it.
Step 9 : Success
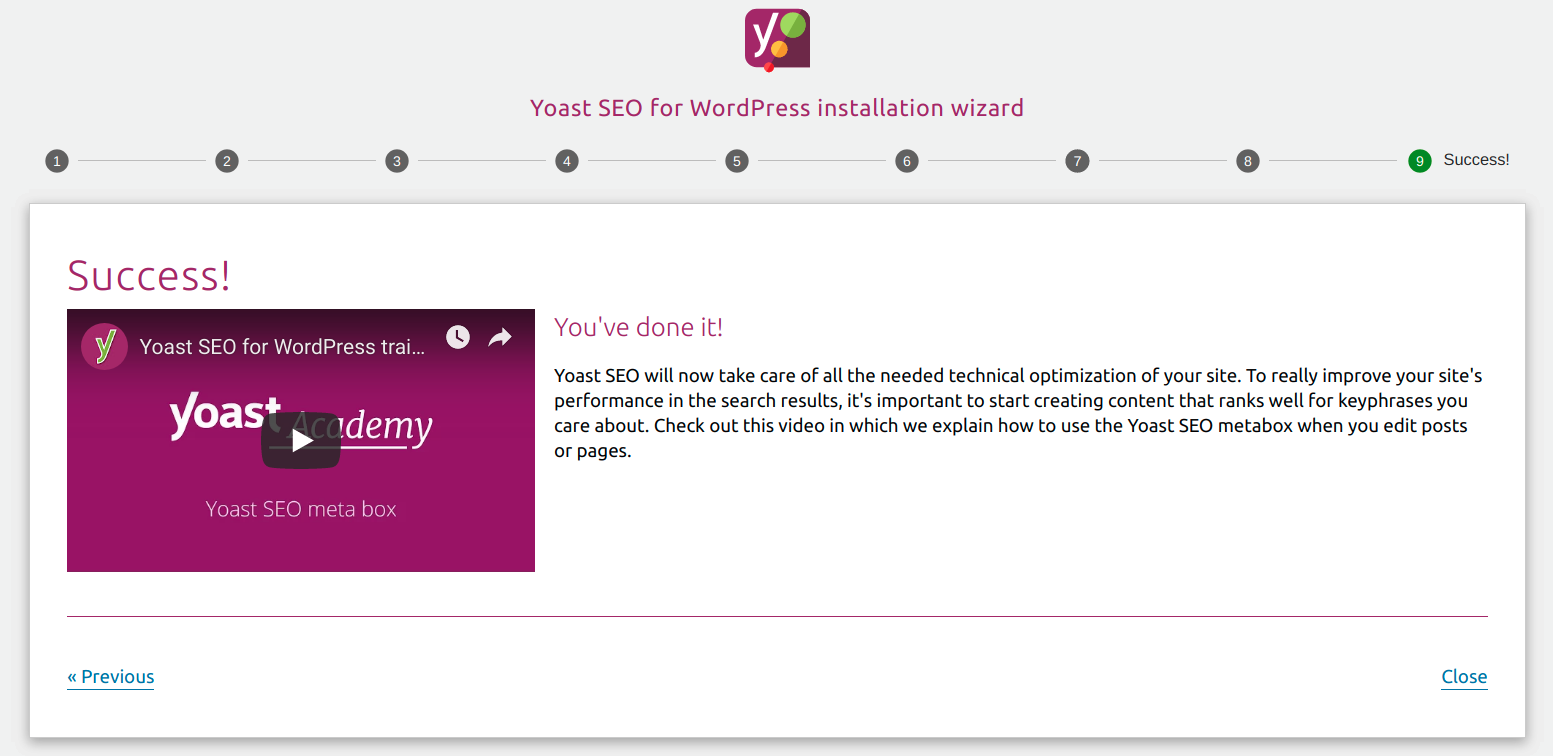
Just keep hitting next until you get to step 9 – Success and then click close